Oftentimes when deploying MIP Sensitive Labels, I run into use cases where customers want to auto label all files in an SPO site. This is usually for a site that will always contain proprietary data, such as a Project Site, or Departmental Site. When this comes up customers are typically looking at the Container Level Labeling trying to use that feature. Unfortunately, Container level Labels are all about controlling guests and sharing access, not about applying labels. So to achieve the control we have to build a custom workaround.
We have two options for applying a default label, each of which has their own strengths and weaknesses. The options are an MDCA Blind Label or MIP Auto-Labeling.
MDCA Blind Label
Option 1 to achieve this is a Defender for Cloud App (Formerly MCAS) File Policy. To make this feature work, you need to have gone through the prerequisite of connecting up MCAS to perform file scanning with Sensitive Labels. After that is done, we can create a File Policy. Next, name your policy and remove the default filters.

Next select “Appy to” and choose selected folders. In the add Folders area search for the SPO Root Site / Document Library Root Site. If it is not showing when you search by name you may need to use Advanced Filters. To do this, switch to the Advanced option and select and Parent Folder. In the new search that comes up, we can search for the SPO site we want. After that, we can then select Root Shared Documents Library or any other custom Library.
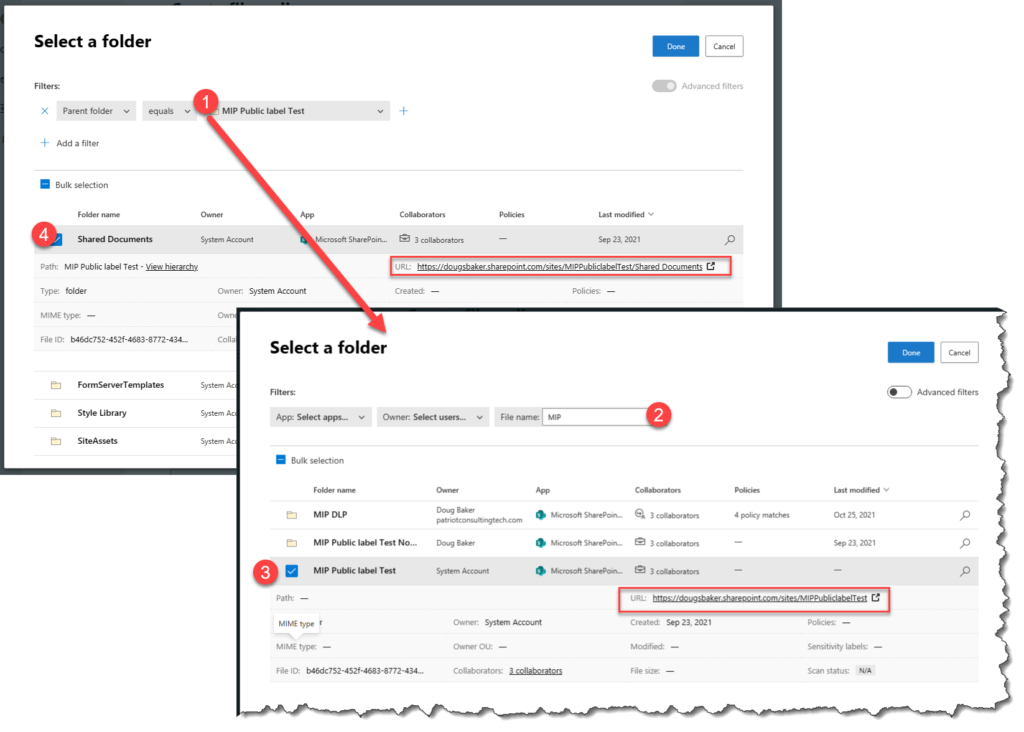
Finally, we need to select the governance action of Apply a Label. Here is one of the interesting options we get in via this portal, in MDCA we can choose to override the user’s choice. This is definitely a benefit to keep in mind as this is a unique option in MDCA.

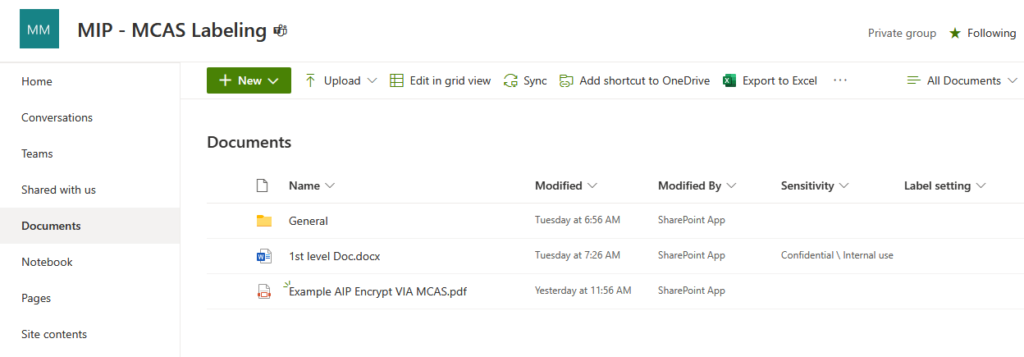
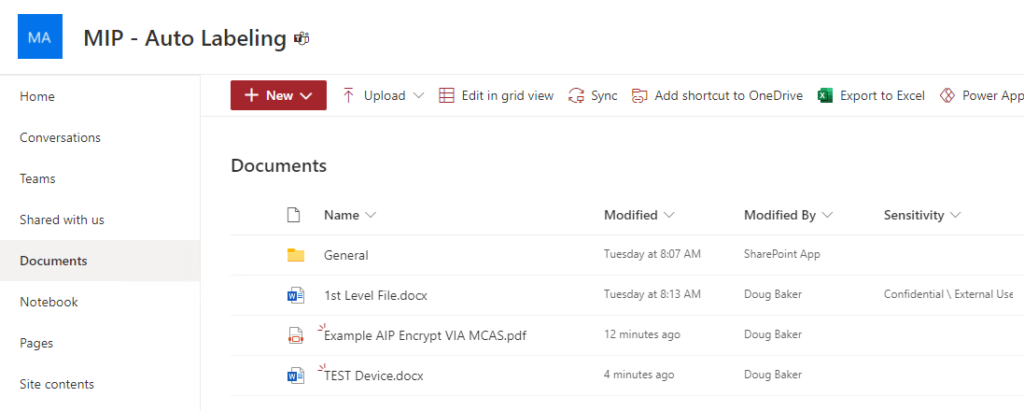
When this is working, files in your site will eventually be updated to use your label. Run time takes roughly two hours in my site to make the change happen. Another item that is worth noting, is that if you are using MDCA to label you can apply labels to PDF’s. Also be aware that MDCA Updates the Last modified by to be the SPO Site. Additionally, if you have not enabled Co-Authoring with Sensitive Labels you will not be able to open the file via Web Browser.
MIP Auto-Labeling
Option 2 is to use Auto Labeling in the Compliance Center. This is a great feature, and typically I recommend orgs use this with its built-in function of classifying based on the detected data in the file. However, for many customer scenarios, they don’t have a specific data type in their files. So to make it apply to a whole SharePoint library we need to game this technology.
The First Step in this is to create a Custom Sensitive Info Type(SIT). In this case, we will essentially need to create a label that detects any data. For this, you will create a custom item I usually label as “All Data”. Under Compliance Select Sensitive Info. next Create a new data type and call it “All Data” In the next area we will add a regex [a-zA-Z 0-9]+ , Please note this can be adjusted to be more inclusive.
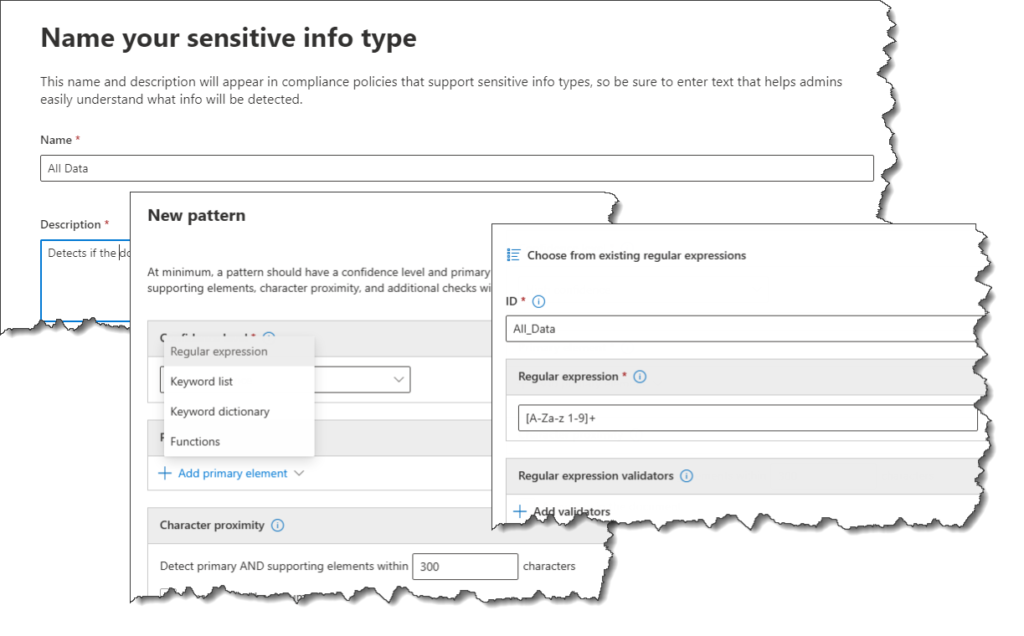
This is the Secret Sauce, this Regex essentially will hit on any file that has any content. This allows us to use the Auto-Labeling engine and target an SPO Site. We will need to create a new policy scoped to our SPO site, once scoped simply use our new “All data” and we will be all set.
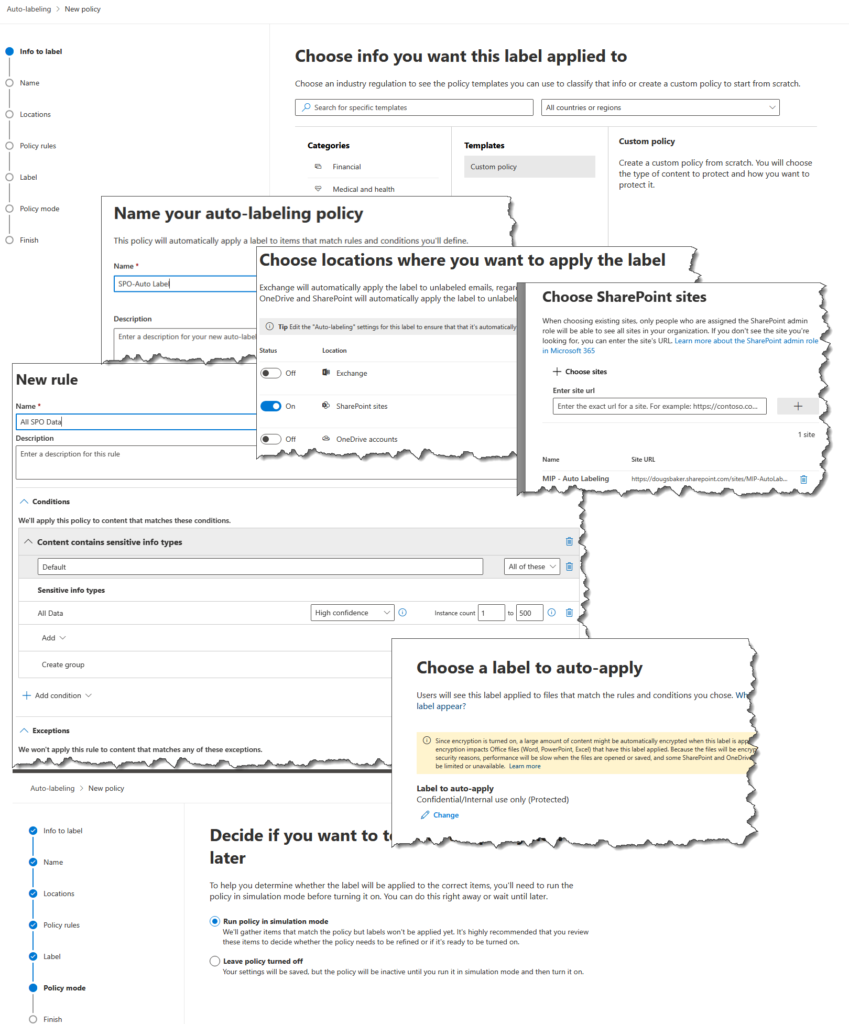
This engine runs very fast and once you have gone through your test phase you will be able to label files very quickly. This Auto-Labeling works roughly in 15 minutes in my tenant. The other benefit is that it keeps the last modified using the same user that last touched the file. The downside is PDF files are not supported for labeling but if Co-Authoring is not enabled you will be able to open the labeled file in the Web.
So there you go 2 options to label all the files in an SPO site. Hope this helps!